
How to Type the Top Row Without Looking
Upward reach vectors, anchor preservation, and muscle memory exercises for QWERTYUIOP.
Core technique
When reaching for the top row, do not slide your entire hand upward. Your wrists remain floating in their neutral home position; only the target finger extends diagonally up to strike the key, and it retracts back to the home row immediately after impact.
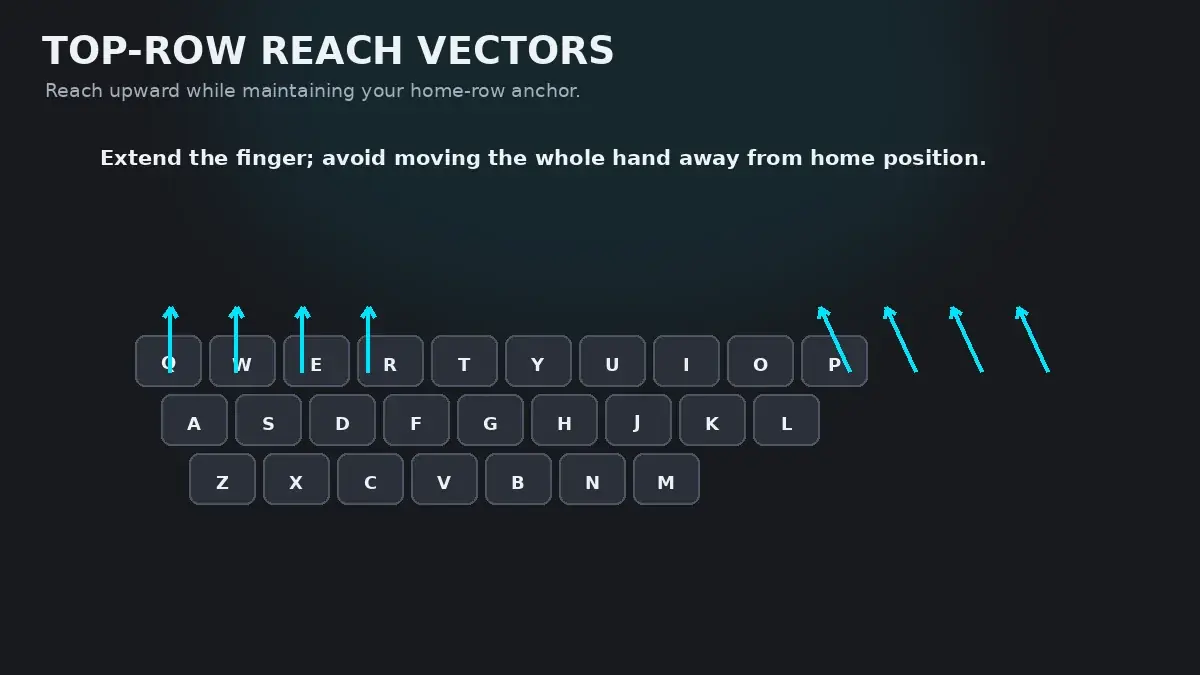
The Geometry of Top-Row Reaches
On standard QWERTY keyboards, the keys are not arranged in a perfect square grid. Instead, each horizontal row is staggered slightly to the left or right—a mechanical legacy from 19th-century typewriters where metal typebars needed clearance to swing.
Because of this physical stagger, extending your fingers straight forward from the home row will cause you to miss the top keys entirely. Every top-row reach requires an upward-left diagonal trajectory. Understanding this diagonal angle is the secret to striking top-row keys blind with pinpoint precision.
Exact Finger Reach Vectors (QWERTYUIOP)
Review each finger's specific diagonal travel angle and common recovery tips:
| Finger | Home → Top | Diagonal Reach Vector | Biomechanical Precision Tip |
|---|---|---|---|
| Left Pinky | A → Q | Up-left diagonal (approx 15 degrees) | Keep left wrist straight; do not let hand swing outward to reach Q. |
| Left Ring | S → W | Up-left diagonal straight upward past S | Ring finger extends cleanly while middle finger stays near D. |
| Left Middle | D → E | Up-left diagonal extension | The letter 'E' is the most frequent letter in English. Strike firmly and return immediately to D. |
| Left Index | F (Anchor) → R and T | R: Up-left extension; T: Up-right stretch | The reach from F to T is an extended diagonal. Retract immediately back to the F tactile bump. |
| Right Index | J (Anchor) → U and Y | U: Up-left extension; Y: Extended up-left stretch | Reaching for Y is the longest index-finger leap on the top row. Never drag your whole palm across. |
| Right Middle | K → I | Up-left diagonal straight past K | Very stable reach. Pair with left-hand E to drill common vowel combinations like 'ie' and 'ei'. |
| Right Ring | L → O | Up-left diagonal extension | Keep palm level; avoid dipping wrist downward when ring finger extends to O. |
| Right Pinky | ; → P | Up-left diagonal extension | Pinky reaches up to P while ring finger stays anchored on L. |
The Anchor-Preservation Rule
The most common reason typists lose their place on the top row is the "flying hand" syndrome. When reaching for E, they lift their entire left hand into the air. With no fingers in contact with the keyboard, their spatial coordinate system vanishes, forcing them to look down at their fingers to find their way back.
To eliminate this, enforce the Anchor-Preservation Rule:
- Whenever one finger extends upward to strike a top key, at least one other finger on that same hand must maintain light physical contact with its home key.
- When the left middle finger reaches up for
E, the left index finger should stay lightly grounded onF. - When the right ring finger reaches up for
O, the right index finger stays grounded onJ.
This physical tether guarantees that your reaching finger can effortlessly snap back to base camp without visual searching.
Vowel Coordination Drills
Four of the five English vowels live on the top row (E, U, I, O). Mastering these vowels combined with home-row anchors unlocks fluent typing for thousands of everyday words.
Drill 1: Left-Hand Top Extensions (E, R, T, W, Q)
frf ded sws aqa ftf frf ftf ded sws aqa wet red raw tree water
Drill 2: Right-Hand Top Extensions (U, I, O, P, Y)
juj kik lol ;p; jyj juj jyj kik lol ;p; you out lip pour you
Drill 3: Top-Row and Home-Row Mixed Words
there write quite point quiet power title outer reply route equip
Interactive Curriculum Practice
To drill these reaches with instant feedback and mistake tracking, proceed through the dedicated top-row modules in HeroTyping Lessons:
- Lesson 5: Top Row Left (Q, W, E, R, T)
- Lesson 6: Top Row Right (Y, U, I, O, P)
- Lesson 7: Top Row Combined Practice
- Lesson 8: Top Row & Home Row Integrated Words
FAQ
Why do my hands float away from the home row when I reach for the top row?
Hands float away when typists translate their entire arm or wrist toward the top row instead of extending just their finger joints. Keep your wrists hovering in a fixed position and allow your knuckle joints to uncurl upward. One finger should always maintain feather-light contact with its home key to keep your spatial orientation intact.
Why are the letters T and Y so difficult to hit accurately?
Because 'T' and 'Y' sit in the center column and require both an upward extension and a lateral stretch. Reaching for 'T' requires the left index finger to move up and right, while 'Y' requires the right index finger to move up and left. To master them, practice returning instantly to the 'F' and 'J' bumps after every strike.
Should I learn all top-row letters at once or in small batches?
Learn them in three distinct batches: first vowels ('E', 'I', 'O', 'U'), second common consonants ('R', 'T'), and finally peripheral reaches ('Q', 'W', 'P', 'Y'). This allows you to form real words immediately without overwhelming your working memory.
How do I prevent my pinky from straining when reaching for P and Q?
Pinky strain is usually caused by anchored or planted wrists. If your wrists are glued to the desk, your pinkies have to hyperextend. Float your wrists slightly above the desk surface so your whole hand can pivot micro-fractions of a millimeter without straining tendon sheaths.
Sources & references
- Kinematic Analysis of Hand and Finger Motions During Touch Typing — Soechting, J. F., & Flanders, M. (Journal of Neurophysiology, 1997)
- Motor Control and Spatial Coordinates in Keyboard Reaching Tasks — Gordon, J., Ghilardi, M. F., & Ghez, C. (Experimental Brain Research, 1994)
- Upper Extremity Posture and Tendon Excursion in Keyboard Operators — Armstrong, T. J., et al. (Ergonomics, 1994)